Whether you want to disable the do you want to allow this app to make changes prompt, or simply turn off the feature temporarily, we have some helpful tips for you.
Why are UAC settings important?
If you are planning to disable UAC on your Windows 11 PC, here are a few reasons why you should think twice before the action:
Inhibit malware infiltration – The UAC protects your PC from malware, thus, helping organizations offer better-managed desktops. Offer security to non-administrator accounts – With UAC, you can run apps and tasks without administrator access with complete security. Prevent the installation of unauthorized apps – The User Account Control blocks the automatic installation of unsafe apps and prevents any changes to the system settings. Allow login with a standard user account – UAC allows all users to log on to their devices using a standard user account. Run apps with administrator token – When you want to run an app with more than standard user rights, with UAC, you can run apps with their administrator token.
How do I turn off UAC in Windows 11?
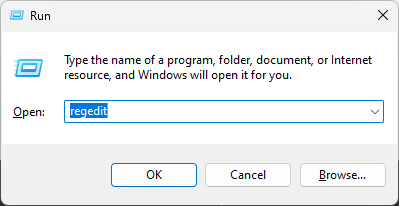
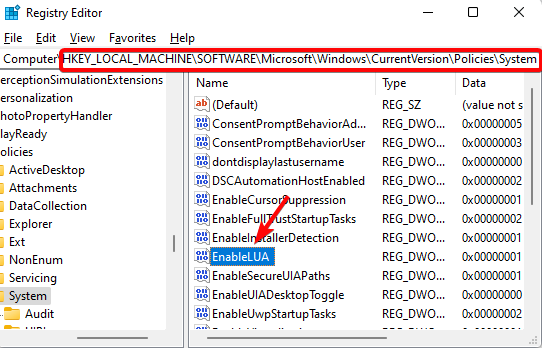
1. Disable UAC in Windows 11 registry
Now, close the registry editor, and restart your PC. The UAC settings should be disabled successfully now. To enable the User Account Control Settings back again, follow the above instructions, and change the value data from 0 to 1. For broken registry items in Windows 11, you can refer to our manual on how to fix the issue.
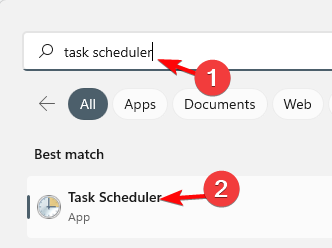
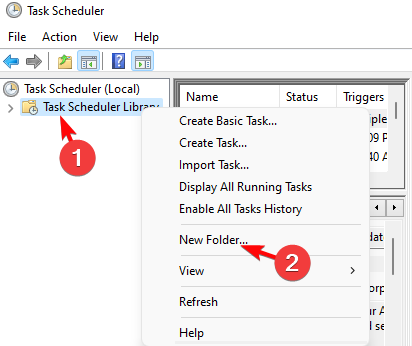
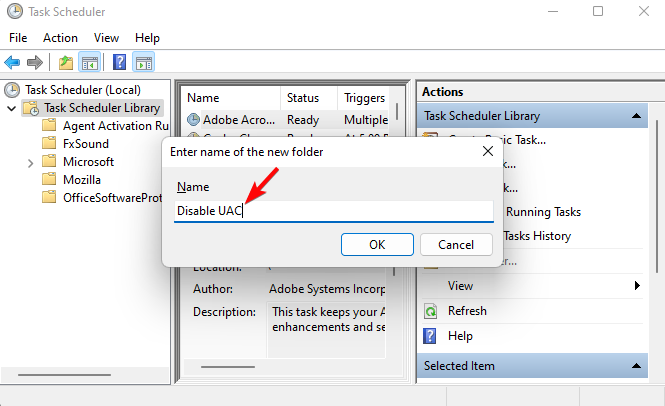
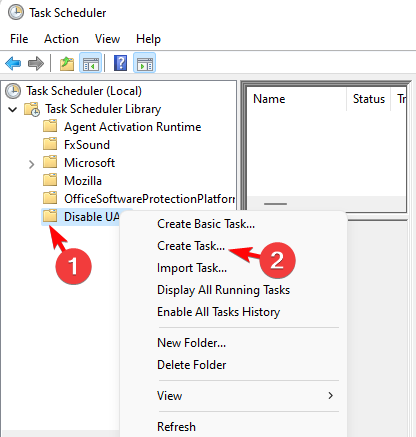
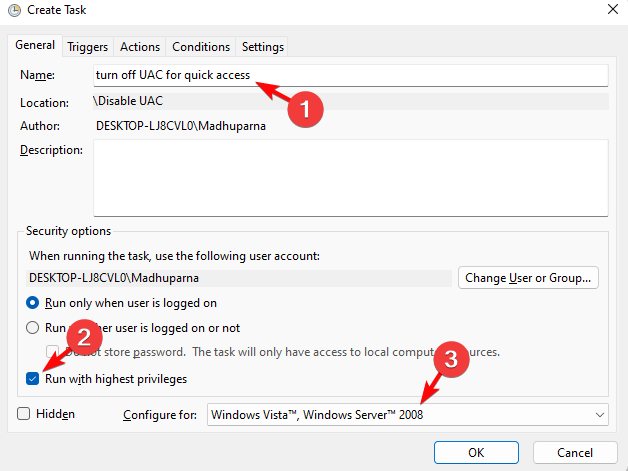
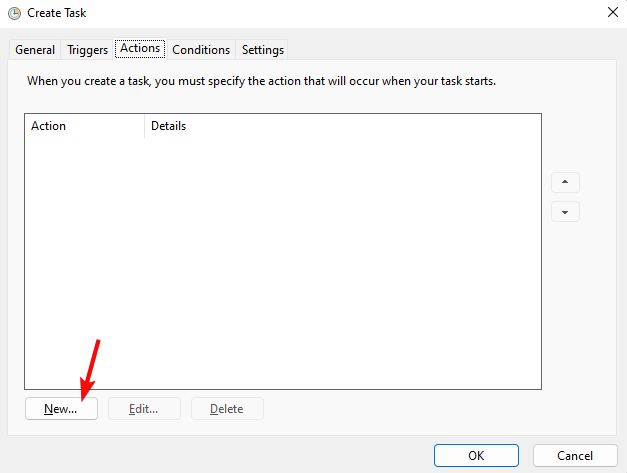
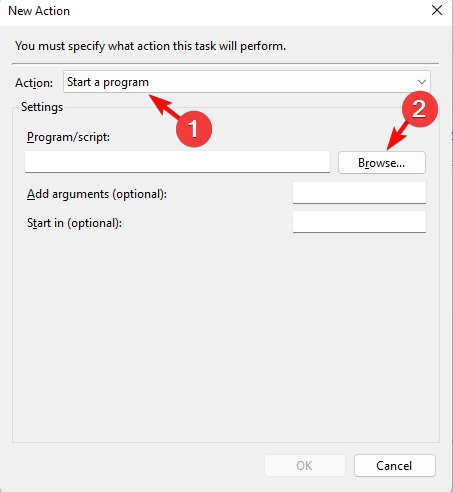
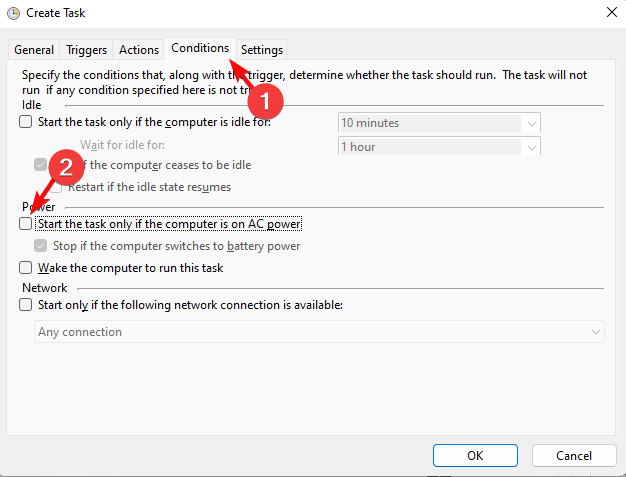
2. Turn off UAC for specific programs in Windows 11
You have now successfully disabled the UAC, so the next time you start the target app, you would not see the prompt. SPONSORED To undo the action, and re-enable UAC, simply delete the created task and the folder.
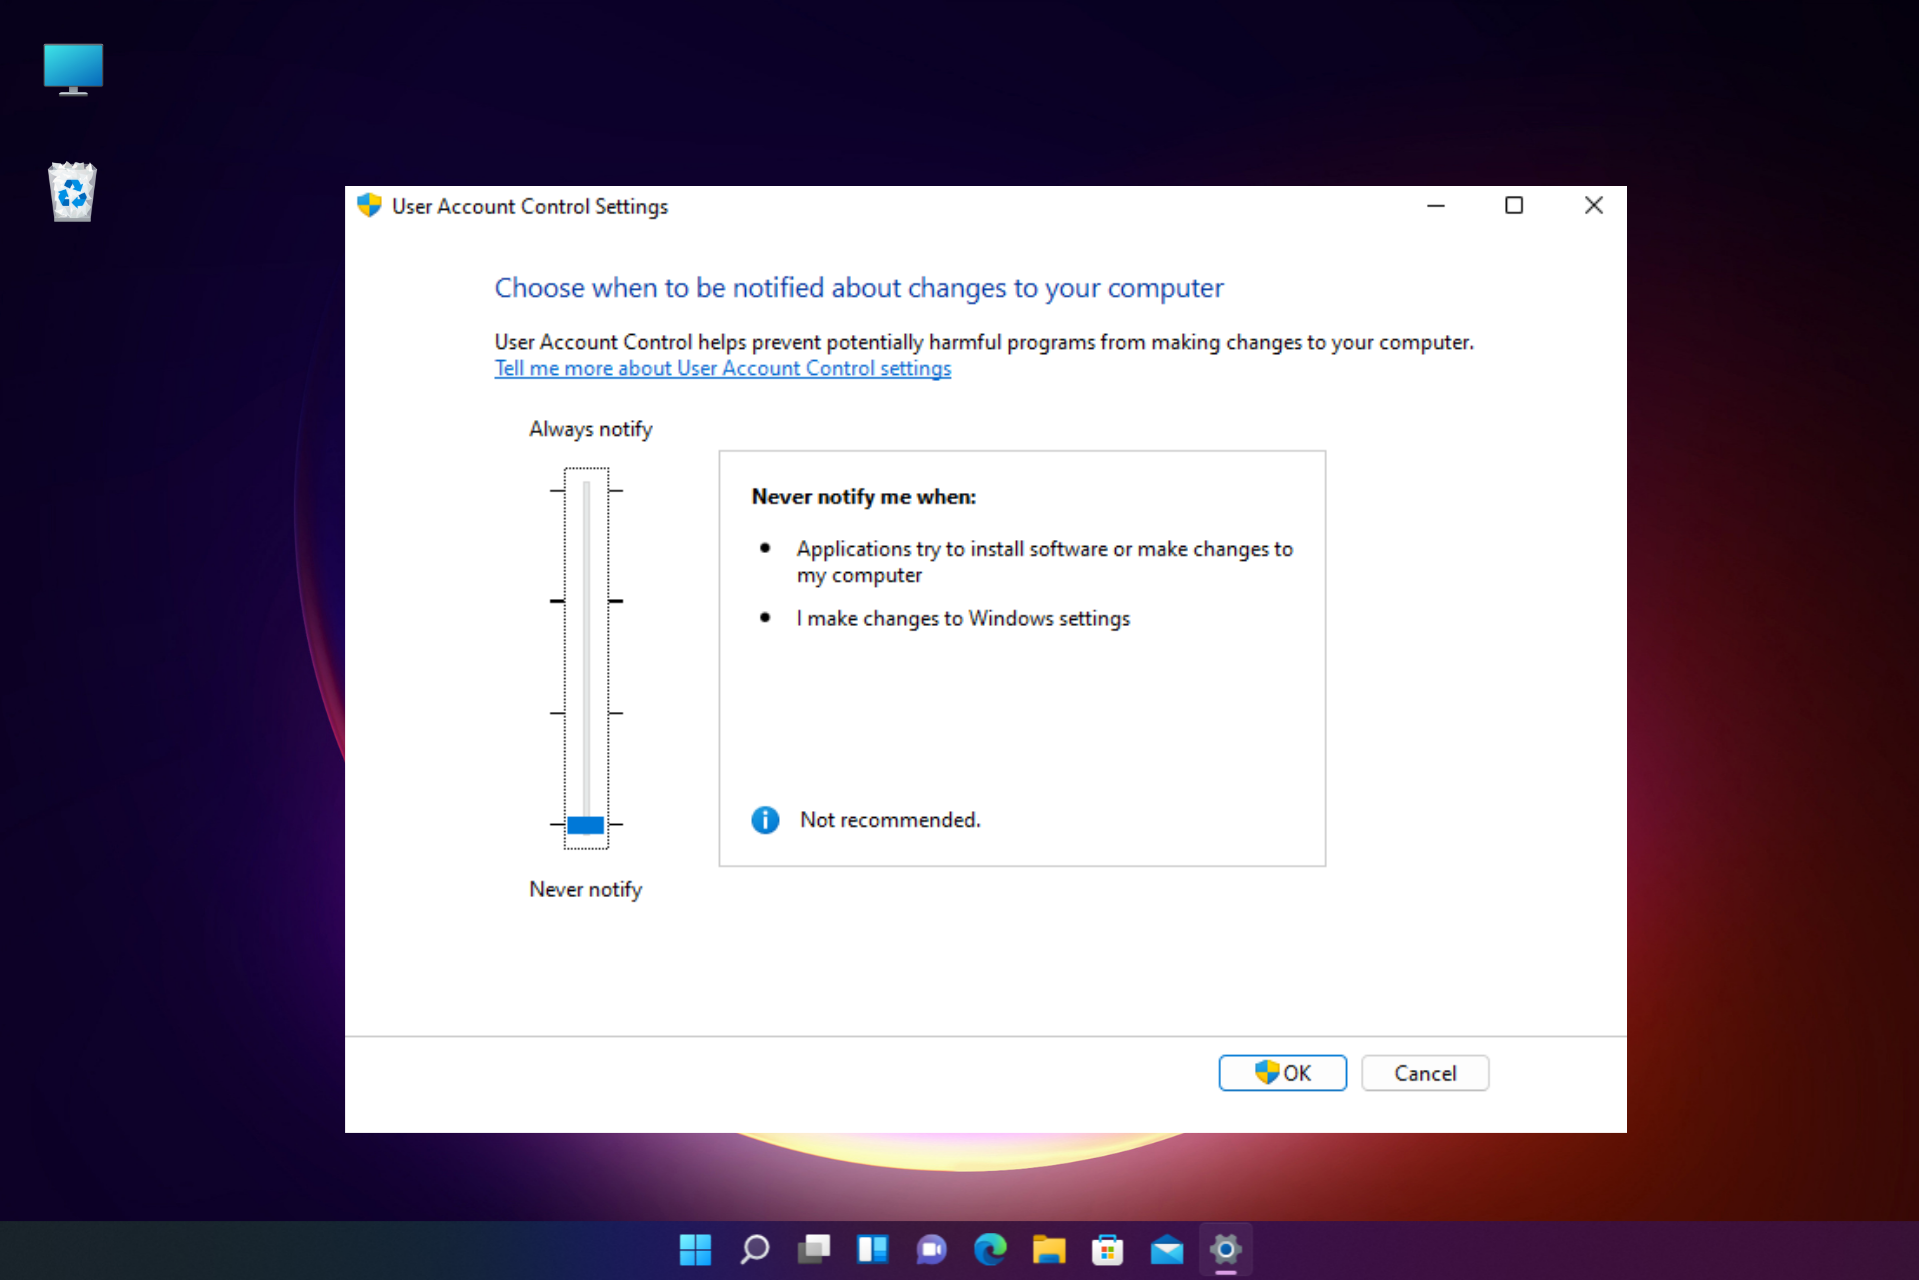
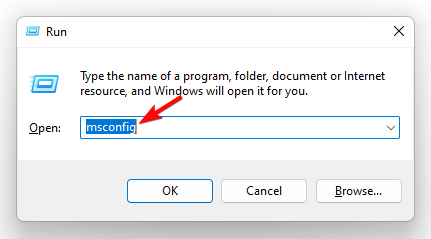
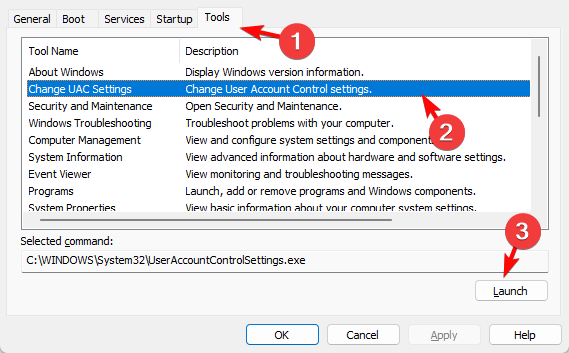
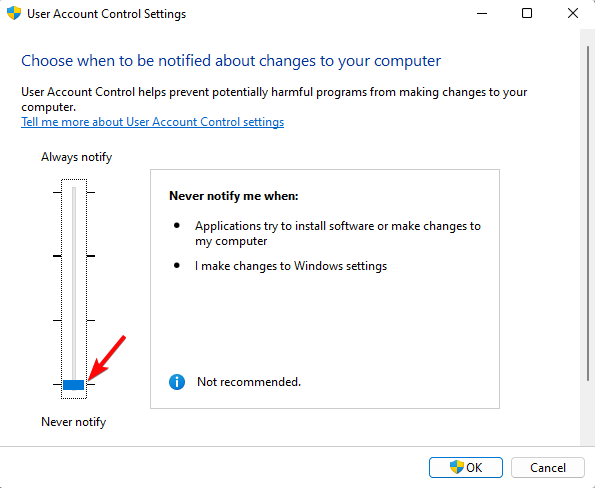
3. Deactivate UAC with msconfig in Windows 11
Once done, restart your PC, and now try opening the target app. It should open without the UAC prompt. However, you can repeat the above instructions again, and in Step 3, move the slider back to Always notify to turn the UAC back again. Besides, you can also use msconfig to disable non-essential services in Windows 11, as explained in our post. However, if you are planning to use legacy apps or an advanced user who wants to disable UAC on your Windows 11 PC but is unsure how to, the guide above should help you. If you want to enable UAC on Windows 10, you can follow our detailed post for quick guidance. For any other queries on the User Account Control settings, do let us know in the comments box below.
SPONSORED
Name *
Email *
Commenting as . Not you?
Save information for future comments
Comment
Δ

![]()
